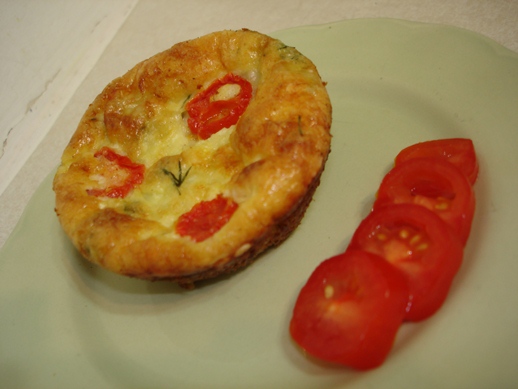
look ma, no crust!
 Seeley deBorn
 I've been feeling lately that working full time affords me less time to get shit done than full time school and part time work combined do.
I think this is mostly because I'm out of the house for at least 10 hours every day. During the school year, I have to spend a good chunk of time studying and doing homework, most of which I do at home. Homework. At home. Who knew.
Granted school and work together are a lot of work, and I think in total I put in more hours each week, but at least some of them are at home. In my pajamas. And I can take half an hour here and there to do things like... cook...
But, I managed to get a bit of time in this week to make something and though this recipe really is quite fast to put together, I ended up spending more time washing the dishes afterward than I did cooking. (Don't worry, this isn't a dishes-intensive recipe or anything, I'm just dumb sometimes)
Mini Quiches
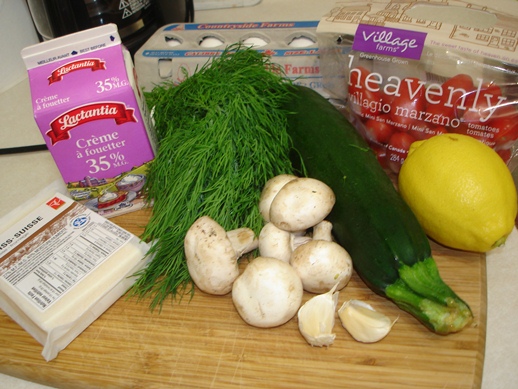
What you need:
- 1 zucchini
- 5 mushrooms
- 2 cloves garlic
- 3 tbsp chopped fresh dill
- 1 tsp lemon zest
- 1 to 2 cups grated swiss cheese
- 3 eggs
- 1 c whipping cream
- salt and pepper
- small tomatoes
What you gotta do:
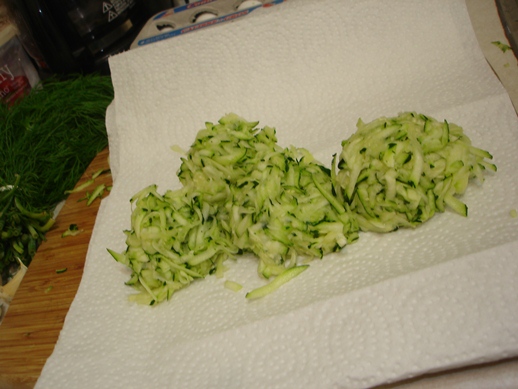
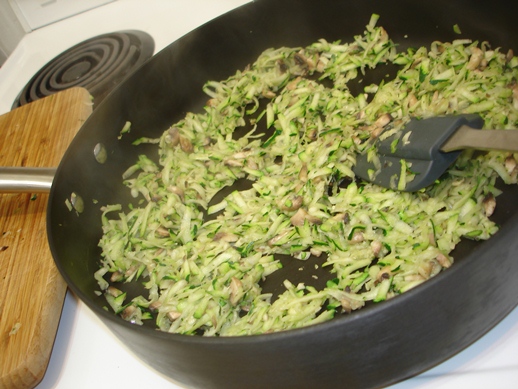
Grate your zucchini. Mine was extremely juicy (srsly, like a cucumber) so I rolled it up in paper towel and gave it a squeeze to get some of the water out.
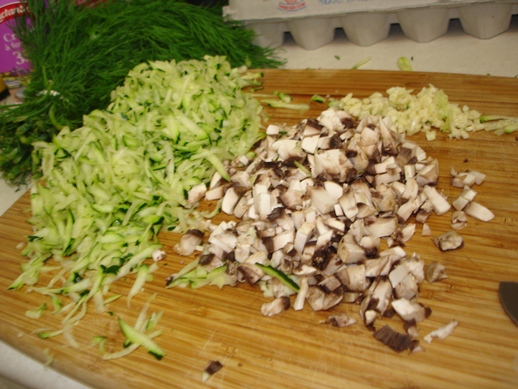
Chop the mushrooms and garlic nice and small.
Warm a bit of butter in a pan over medium high heat. It should be just starting to brown.
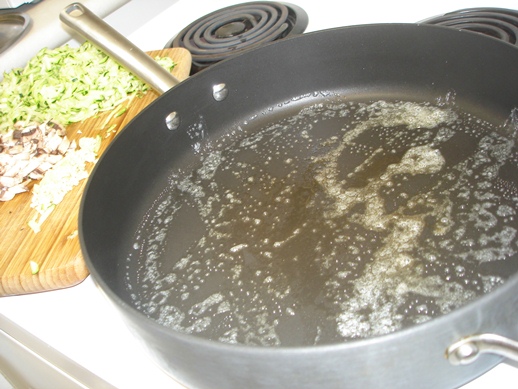
You want the high heat here to get rid of the water in the veggies so you don't end up with soggy quiches. Once you've had them in the pan for about 5 minutes, they'll be as waterless as they're likely to get, so remove them from the heat and set them aside for a minute.
While that's cooling, combine the eggs and cream.
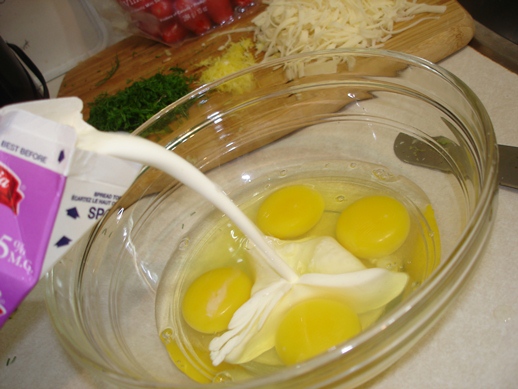
Add some salt and pepper and the lemon zest to the eggy stuff.
Now, we're doing quiches, yes, but we haven't made a crust yet, no.
That's because there isn't one.
The idea here is that the eggs and cheese will brown and crisp nicely in the hot oven so that they form a bit of a crust on their own.
Now, I kinda (on purpose) missed a step when I made mine. I didn't grease the muffin cups. It's a non-stick pan, and I've had disastrous results in the past when I greased non-stick pans. Disastrous. Like, nothing was coming out of that fucker, disastrous; entire thing went into the bin, disastrous.
I had a bitch of a time getting mine out. I'm not sure if greasing would have made the removal process better or worse though. All I know is, I'm pretty sure you're not supposed to clean a non-stick pan with a Mr.Clean Magic Eraser.
Dude, I let the freaking thing soak for days in both hot and cold water, with and without soap and nothing was getting that shit off.
I highly recommend you either grease your pan, or try foil muffin cup liners.
Anyway.
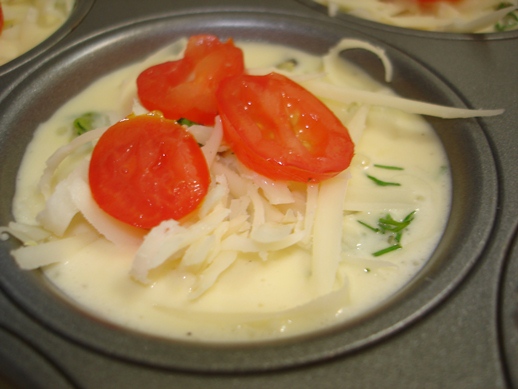
Once you've greased your muffin cups, start filling them.
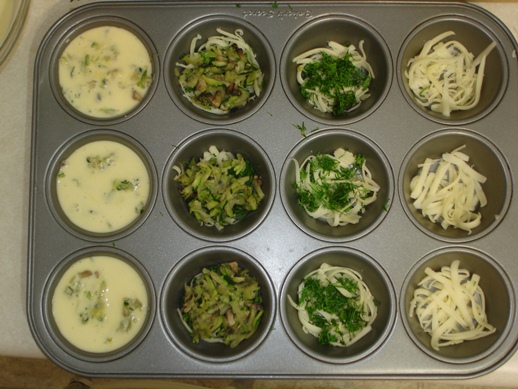
Cheese on the bottom to form part of the crust.
Dill and veggies for the filling.
Covered with savoury custard.
Topped with more cheese.
I still had some of those awesome tiny tomatoes, so I sliced them and decorated the tops with them.
Bake... um, preheat your oven to 400... then bake at 400 for about 15 to 20 minutes. They should be lovely and golden on top. They'll be kinda puffy when you take them out, but like most eggy things, they'll deflate as they cool.
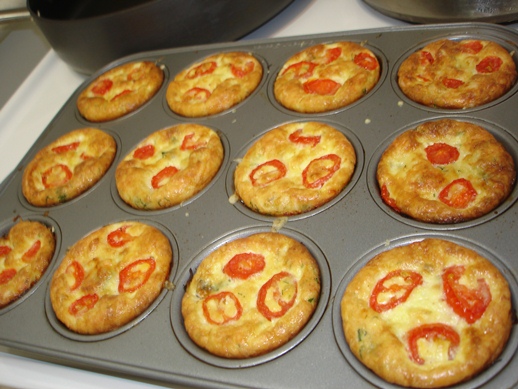
That's okay, they still look pretty.
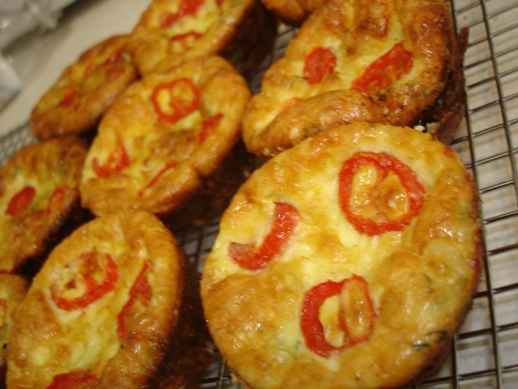
With the help of a paring knife and a large spoon, I was able to detach them from the sides and bottom of the muffing cups, but a few edges did end up a little ragged.
Pretty sure the only way I'm going to be able to bake in that pan again is if I line it with paper cups. Fine for cupcakes, but I like my muffins naked.
What have you stuck to a pan??