Search
Categories
Have a request?
This form does not yet contain any fields.


    Entries in childhood (12)

    Friday
    Aug122011

    Ice Tea Granita - Summer on a Spoon

    To me, nothing says summer like ice tea.  When I was little, Mom always had a big glass jug of it in the fridge, or out brewing in the sun.  Most people probably have childhood memories of drinking Kool-Aid or even lemonade, but not me.  Ice tea was always my favorite.  Sometimes Mom would make it with lemon, sometimes with mint and lime.  However she made it, I loved it, and still do.  So when I thought of making granita, it was only natural to use ice tea.  When I told Hubby about my idea, he pretty much thought it was lame and wouldn’t look good for my post.  Well, that only made me want to do it even more, of course. 


    Here’s what you’ll need:

    6 cups water
    ¾ cups sugar
    10 teabags
    1 lemon
    1 lime


    Bring the water to a boil and turn off the heat.  Remove it from the hot burner and add the teabags. 

    To make them easy to pull out, just drape the tags over the edges of the pan, just make sure they’re not touching any hot burners. 

    So, let’s talk tea.  As you can see, I used Lipton.  If you can find Newman’s Own, it is, in my book, the best there is for ice tea.  Unfortunately, I couldn’t find any at my local grocery store, and didn’t have time to order some. 
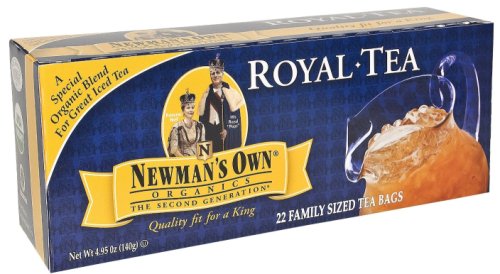
    That being said, Lipton will do.  I’ve found most fancy teas don’t make the best ice tea, but I’d stay away from generic brands, as well. 

    So, back to our tea.  It needs to steep for 5 minutes.  Set a timer, because if it steeps too long, it will become bitter.  During those 5 minutes, you should be able to juice your lemon and lime.

    I just have to rave about my juicer once more.  The first time I used it, I wasn’t sold, but I have really grown to love this thing. 

    I was able to get ½ cup of juice out of 1 lemon and 1 lime.  If your limes are small, you may need to use 2. 

    Back to our tea again.  After 5 minutes, remove the teabags.  It should be nice and dark.  We need strong flavors that will hold up during the freezing process. 

    Pour in your sugar and stir, stir, stir, until it is completely dissolved. 

    Now pour in the juice. 

    Stir once more and go relax for awhile.  It needs some time to cool down.  When it gets to the point that it no longer steams when you stir it, go ahead and pour it into a glass dish. 

    Don’t use a square pan, it’s not big enough.  Go with a 9x13.  Yes, I know I poured it into a square pan, but shortly after that, I realized it would have been much smarter to use a bigger pan because it would freeze faster and more evenly, and would also leave more room for what's to come.  Into the freezer it goes.  It’ll need several hours to freeze.  I actually left mine overnight. 

    When it’s completely solid, remove it from the freezer and begin scraping the surface with a fork. 

    Keep scraping until you have a nice pile of tea snow.

    Spoon it into a dish, and serve immediately.  You can leave it in the freezer in its solid form for a few days, but wait to scrape it until right before eating it. 

    So, what did Hubby say when he tried a bite of it this morning?  “That’s really good!”  Not sure which one I savor more… the ice tea granita, or the satisfaction of, once again, being smarter than Hubby thinks I am.  


    Friday
    Apr012011

    Peanut Butter Twigs

    When I was a little girl, my very favorite candy bar was Peanut Butter Twix.  Over the years they’ve disappeared repeatedly from store shelves, only to reemerge in new packaging or with a new spin.  At one point, you even had to buy them on the cookie isle.  Their latest rendition, Twix PB, is simply an abomination.  The idea sounds good, changing the cookies to chocolate, but it’s not.  On the down side, this means I can no longer get my favorite childhood treat.  On the upside, the lack thereof is what inspired me to recreate the original, but on my terms.  No artificial crap, no hydrogenated whatever, and no mystery, can’t pronounce it, ingredients.  Oh… and no dipping, because quite frankly, dipping is a pain in the ass, and we already covered that here.


    Here’s what you’ll need: (minus salt and vanilla.  D'oh!)

    Crust:
    ½ cup (1 stick) butter
    ½ cup Powdered Sugar
    1 teaspoon vanilla
    1 cup all purpose flour

    Peanut butter layer:
    1 cup Peanut butter (organic or all natural)
    1 ¼ cups powdered sugar
    1 teaspoon vanilla
    ½ teaspoon salt
    3 Tablespoons half and half

    Chocolate ganache:
    1 cups milk chocolate chips
    2 Tablespoons half and half

    First things first.  Preheat your oven to 300° and line a square 8x8 pan with parchment, leaving plenty of excess for ‘handles’.  If you butter the pan first, the parchment will stay in place better. 

    Let’s start with the crust.  In a mixing bowl, beat together a stick of butter and a teaspoon of vanilla until it looks like this:

    Sift in the powdered sugar (that’s icing sugar for you non-Americans).  I know I’m starting to sound like a nag, but yes, you really do need to sift it. 

    Keep mixing until it becomes the consistency of icing. 

    Now add the flour and mix some more.  When it looks like this, you’re going to think I’ve led you astray.

    But keep mixing.  It will eventually come together to form a dough.  When it does, dump it into your pan.

    Press it evenly into the bottom of the pan.  If it sticks to your fingers, just flour them a bit.  When it’s mostly even, prick the dough all over with a fork. 

    This is called docking.  It allows steam to escape during the cooking process, which keeps bubbles from forming in the crust and keeps it flat.  Bake the crust for 35 minutes, or until it’s golden around the edges and just beginning to turn on top.  Allow it to rest in the pan for 5 minutes or so, and then remove it to a cooling rack. 

    When the crust has cooled, it’s time to start on the filling… topping?  Whatever.  Peanut butter and chocolate goodness.  In your mixing bowl… you did wash your mixing bowl while the crust was cooling, right?  Do it now, I’ll wait.  *whistling the theme song from Jeopardy*  Ok, now that it’s clean and dry, throw in the peanut butter, butter, salt, and vanilla and mix until it looks like this:

    Sift in the powdered sugar (there I go with the sifting again) and continue mixing.  When it looks like this:

    It’s time for the half and half.  3 Tablespoons will make a world of difference.  It should come together into a smooth, dough like consistency.  Scoop it onto your crust.

    Time for pressing again.  At first, I thought I’d just spread it with an offset spatula.  Um, no.  Fingers are definitely the tool of choice here. 

    And now it’s finally time for the chocolate.  As I said before, we’re not dipping.  We’re just going to spread a nice layer of chocolate ganache on top.  In a glass container (I like to just use my measuring cup) add 1 cup of chocolate chips and 2 Tablespoons of half and half. 

    Microwave for 30 seconds, then stir, stir, stir, and keep stirring.  Until it becomes a smooth, fudgy icing.  Then, spread that over the peanut butter layer. 

    Refrigerate for at least an hour to allow everything to firm up before cutting.  Run a knife along the pan edges to loosen the chocolate and peanut butter layers, then pull the whole thing out and place it on a cutting board.  Pressing straight down with your knife, cut the whole thing in half, and then cut each half into long fingers. 

    These are more delicious than any store bought candy bar could be.  Even if Twix decides to reincarnate the original, I think I’ll stick with my twigs.

    So, what was your favorite childhood treat?   


    Page 1 ... 2 3 4 5 6