Search
Categories
Have a request?
  • Don't be shy!

    Is there something you'd like to see more of or a specific recipe you'd like us to make? Or do you have a question related to food or cooking? Even if you just want to say hello and introduce yourself, feel free to use the form below!
  • Your Name *
  • Your Email *
  • Subject *
  • Message *


Entries in snack (80)

Tuesday
Apr262011

Walkin' holy

No, this is not about cowbell.

It's a silly way of saying guacamole.

I'm totally panicked and pressed for time here. You'd think that now that finals are over (omg breathe!) I'd be relaxed, but no. I've got a 2 week vacation coming up and I've gotta do laundry, buy hostess gifts, pack, clean my bathroom... Yes, I really do have to clean the bathroom, I haven't cleaned it in over a month because no housework is necessary when finals are approaching.

So, this week's post is actually only part of a post. I made a nice big TexMex feast way back in February when I had a house guest to cook with and for. It was awesome, but since I'm pressed for time, you're only getting part of it. I promise to post the rest ... eventually.
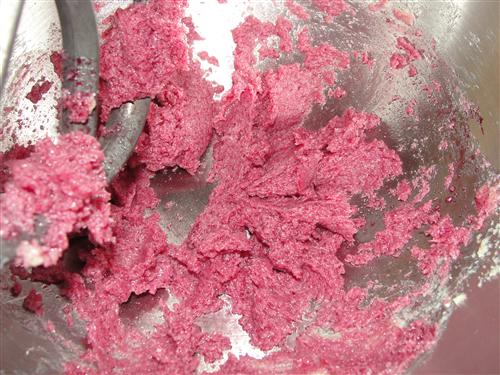
Guacomole

What you need:

What you gotta do:

Finely mince the garlic and put it in a bowl.

Slice the jalapeno in half and remove the seeds and white membrane. Dice it into tiny bits and add it to the bowl.

Wash your hands. I'm freaking serious. Do it now. Don't wait until you're done preparing everything. One touch anywhere near your eyes, nose or mouth will leave you strangely tingly... on second thought, maybe that's your kind of thing. Never mind.

Remove as much of the stem from your cilantro as you can be bothered with. Depends on the day for me; sometimes I pluck every single leaf and some days I just really don't care. Slice it up a bit, and add it to the bowl with the garlic and jalapeno.

Run your knife around the lower equatorial area of the avocado. I know some people do this longitudinally, but latitudinally works too.

Twist gently to get the two sides apart. One half will have a giant freaking seed in it. 

Carefully, whack the heel of your knife, not the tip, the heel, the part closest to the handle, into the seed until it's good and wedged in. Now twist the knife and lift gently. Seed pops out! Yay! But now you have to figure out how to get the seed off the blade without slicing yourself open. Good luck.

Slide a tablespoon in between the skin and the flesh of an avocado half, then run it all around the edges and lift. Voila, perfect.

Now, I know I say 2 avocados in the ingredients, but you keep seeing 3 in the pics. Well, that's because I'm in the frozen wasteland and fresh produce is iffy at best in the winter (I made this back in February remember) and it's pretty common to get avocados that look like this when you cut them open.

They are usually salvageable. You can easily remove them from their skin like the one above and then use the spoon to scrape away the bruised or way over ripe parts.

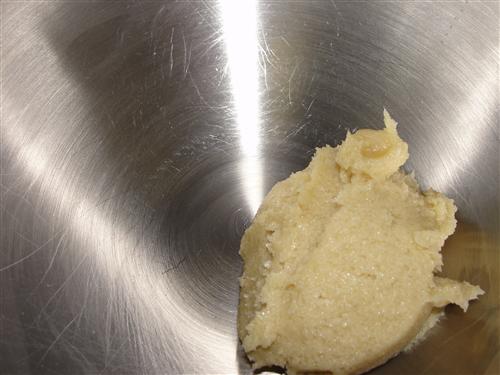
So, dump the equivalent of 2 avocados into the bowl with all the rest of the stuff.

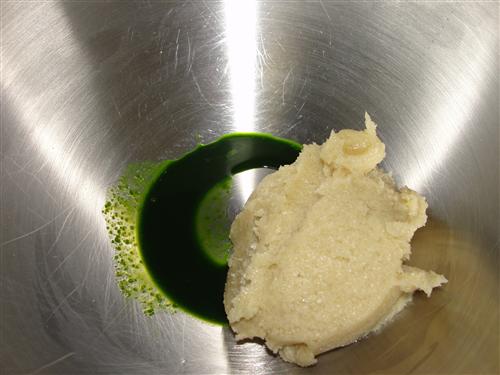
Now, the lime. Really, this part is to taste. I love lime in my guac. Lots of it. Lots. Did I say lots? Because I meant lots. But, my co-cooker and dinner partner prefers it to be a little more subtle. Of course we had to compromise. Add about half a lime's worth of juice to start, and adjust it until you're happy. 

So, before you can check to see if there's enough lime, you'll need to mash. Consistency is up to you. I've seen people make guac with diced avocado and I've seen it done in a blender. I prefer it somewhere in the middle. Chunky enough that it has texture, but mashed enough that it'll stay in a clump on a chip.

Now, it's time to taste it.

Don't use a spoon. Use whatever vehicle you plan on using to eat the guac. Why? Because every chip brand has a different salt content. If you salt to taste from a spoon, it's going to seem way too salty when you eat it off a salted chip.

Add whatever salt you need, and whatever lime you want.

Now, you've got a handy snack, or part of a fancy TexMex dinner.

The rest of which I'll show you another time.

For now, just add tequila. Make it a double.


Friday
Apr222011

The Colorful Cookie Conundrum...

As you probably know, artificial dyes have had quite a place in the news lately for a few of their more common side effects, most notably increasing hyperactivity in children.  Even before all the latest findings I avoided artificial stuff, but now they are officially banned in my house.  Well, with Easter coming up and spring in the air, I want some fun colored goodies.  Sounds like it’s time for a little experiment.  Using nothing but things created by Mother Nature, herself, I set off to create a recipe for beautiful, and tasty, cookies. 

First things first, we have to get the juicing out of the way.  I’ve chosen to use red beet, yellow beet, carrot, and spinach. 

No, this is not my attempt to make healthy cookies.  I promise they won’t taste like vegetables by the time we’ve finished.

Ok, juicing… I happen to have a really awesome juicer, which definitely helps for this process.  In goes veggies, out comes very brightly colored juice. 

Chop your vegetables so they’ll fit through the chute.  Notice I’m using my ugly, old, black cutting board?  That’s because these things will stain.  Be careful not to get them on your clothes, especially.  Unfortunately, you will have to wash the juicer between each to prevent a mixture of colors, but it’s worth it. 

See how pretty?

Now, set those aside and we’ll start on the cookie dough.  Since you can’t divide an egg into four equal parts very easily, I think it best to make a cookie dough ‘starter’, if you will, and then divide that.  Here’s what you’ll need for the cookie dough. 

1 cup butter (2 sticks)
1 ⅓ cups sugar
1 Egg
1 teaspoon vanilla
1 teaspoon distilled vinegar
2 ⅔ - 3 cups all purpose flour
½ teaspoon salt
½ teaspoon baking powder
1 teaspoon baking soda
(If this recipe looks familiar, it’s because I used the same dough for my Valentine’s Day Cookies.) 

In a mixing bowl, whip your butter until it’s soft and fluffy.

Add the sugar and whip for another minute or so. 

Mix in the vanilla, salt, and vinegar, followed by the baking powder and soda.  Finally, add the egg and mix until completely incorporated.

Separate the batter into four ½ cup portions, and return one of them to the mixing bowl. 

Here’s where you have to get a bit creative.  I decided that I would not only add different colors to each portion, but different flavors as well.  Now is when you’ll want to add those as well.  This is how it went for me:

Green – 1 ½ teaspoons spinach juice and ½ teaspoon almond flavor

Yellow – 3 teaspoons yellow beet juice, ½ teaspoon lemon flavor, and 1 teaspoon lemon zest

Orange – 3 teaspoons carrot juice, ½ teaspoon flavor, and 1 teaspoon orange zest

Pink/purple – 1 teaspoon red beet juice and ½ teaspoon vanilla (oops, no vanilla picture)

Yes, I am aware that they sell natural food coloring, similar to the flavorings I’m using there, but what fun would that be? 

Now, add your desired color and flavor combination to the mixing bowl. 

When it’s mixed in, it should look something like this.

Not sure why I didn’t take two pictures with the same color, but you get the idea. 

Next comes the flour.  Start by stirring in ⅔ of a cup.  That should get you pretty close, but in the yellow and the orange, I had to add another tablespoon.  You’re going for a soft, play dough like consistency.  If it’s still sticky, add flour, one tablespoon at a time until it just loses that stickiness.  When you’ve finished with all your different colors, it’ll even look like you’re playing with play dough.  How cute is that?

Here’s a good place to preheat your oven to 350°. 

Now, roll the dough into balls about the size of a quarter and drop them into a little bowl of sugar. 

Shake them around until they’re coated all the way around and then place them on a parchment lined cookie sheet, leaving about two inches between them. (I had to put mine closer together for the picture.  Leave more space than this) 

Bake at 350° for 8-10 minutes, or until the edges just start to brown. 

Not sure why the top right one went a little wonky.  I did mention this was an experiment, didn't I?  The ones that came after these were all perfectly beautiful. 

Cool them for a minute or two on the pan, and then remove to a cooling rack.  When they’re all baked and cooled, taste one of each flavor (yes, I just told you to eat four cookies) and marvel at how good they are!  Then take a picture of the results of all your hard work and show all your friends how talented you are and brag about how you only used vegetable juice to make such beautiful, fun cookies.  (I may or may not have done this) 

Last, but not least, pack the majority of them into a container and send them to work with your husband so you don’t sit around and eat every last one. 

Now, I realize not everyone has a juicer on hand, and I don’t really expect a large number of people to follow this recipe to the letter.  My intent, rather, is to get your creative ‘juices’ flowing, to get you to think outside of the box and look for a more natural alternative to artificial dyes.  I've shown you the things I used in mine, but if you don’t have a juicer, you could probably try blood oranges, or even bottled juice like pomegranate or carrot.  Have fun with it!  That’s what baking is supposed to be about.