Search
Categories
Have a request?
  • Don't be shy!

    Is there something you'd like to see more of or a specific recipe you'd like us to make? Or do you have a question related to food or cooking? Even if you just want to say hello and introduce yourself, feel free to use the form below!
  • Your Name *
  • Your Email *
  • Subject *
  • Message *


Entries in baked goods (96)

Friday
Jan132012

Must. Have. Chocolate!

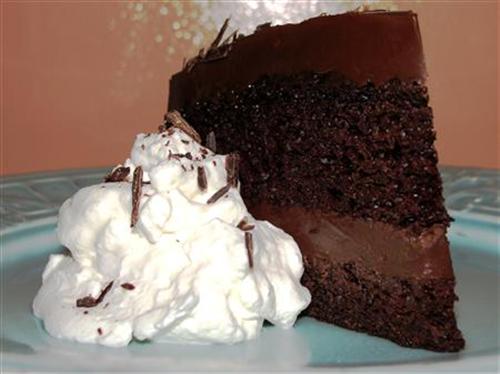
Chocolate.  There really is no other food like it.  I mean, when was the last time you were sitting in front of your computer and thought, “Man I could really go for a piece of broccoli right now!”?  Now replace the word broccoli with the word chocolate.  I bet you’ve thought that at least once in the last week, and probably within the last 48 hours.  If not, you will after looking at the pictures in this post.  As it happens, my chocolate cravings are usually very specific.  Sometimes I want the snap and melt of a bar, sometimes the chew of a brownie, and occasionally, just a nice cold glass of chocolate milk.  This time I wanted a piece of moist, rich chocolate cake with lots of fudgy ganache.  That’s not really something you can get from the nearest grocery store.  At least, not where I live, so that meant making my own.  Fortunately, I had everything needed in my pantry, except the chocolate and cream for the ganache, which I had Hubby pick up on his way home from work. 

Here’s what you need:

1 ¼ cups flour
1 cup sugar
½ cup cocoa powder
1 teaspoon baking soda
½ teaspoon baking powder
½ teaspoon salt
½ cup buttermilk
½ cup hot water
⅓ cup oil
1 egg
1 teaspoon vanilla
Cream and chocolate for ganache

The first you thing you need to do is prepare your pan.  I used an 8 inch round pan that’s probably a good 2 inches deep.  If, like my old pans, yours are not that deep, either use a larger pan, or make two thin cakes.  In my world, you can’t make a cake without using parchment.  Not if it needs to come out of the pan in one piece, anyway.  Since I don’t have parchment rounds, I just trace around the bottom of my pan.

Then you can just cut it slightly smaller than what you drew, and it’ll fit perfectly.  I like to use the If You Care brand of parchment products.  Not only are they free of chemicals and whatever, but they work marvelously.  Since this is a cake, which I’ll just pour in and it doesn’t have to really be spread around, I didn’t bother putting any butter down to keep the parchment in place.  I just dropped it into the pan. 

Once that’s done, go ahead and preheat your oven to 350°.  (I remembered!)  Put your sugar into a mixing bowl, sift in your dry ingredients, and then whisk them together.

In a separate bowl combine your egg, buttermilk, oil, and vanilla.  A 4 cup measuring cup works great for this because you can measure, mix, and pour from one vessel. 

As you probably noticed in the ingredients picture, I had a bottle of kefir.  That’s just because the store I went to didn’t have buttermilk.  To be honest, I’m not even sure what the difference is between cultured buttermilk and kefir.  Kefir smells more like yogurt, but they’ve got to be very similar chemically, so you can always substitute one for the other.  Whisk together your wet ingredients and pour them over the dry. 

Mix until everything is incorporated, and then scrape everything down really well, including the bottom of the bowl.  Mix the whole thing on medium speed for a good minute or so, and pour it into your waiting pan. 
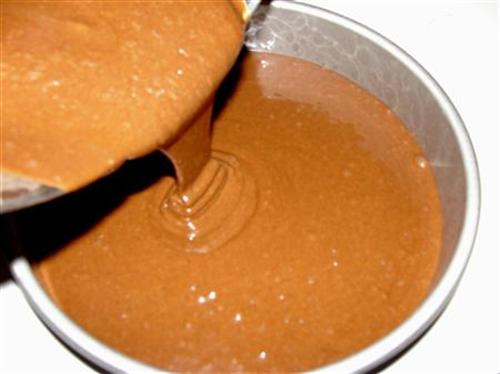
Into the preheated oven for 36-42 minutes, or until a toothpick inserted in the center comes out clean.  A few crumbs on it are fine, just no batter.  If yours cracks a little, like mine did, don’t worry.  The cake will settle, and then we’ll be covering it with a nice thick layer of ganache. 
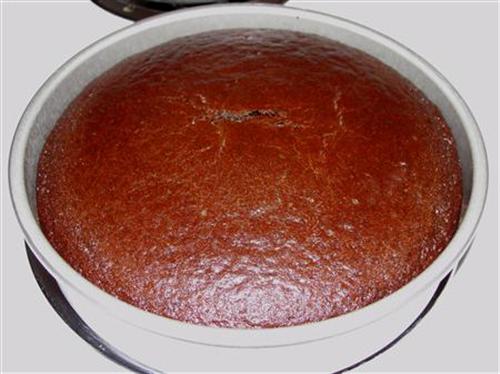
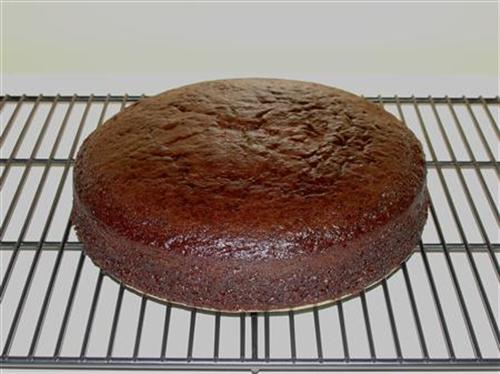
While the cake is hot, run a butter knife around the edge.  Allow the cake to cool for 30 minutes in the pan, then remove it and allow it to finish cooling on a rack.  Just leave the parchment in place for now.  Once the cake has cooled completely, put it back into its pan and into the fridge.  Getting it nice and cold will make it much easier to cut into layers.  Since I had to wait for Hubby to get home with my ganache ingredients, I actually just covered the cake and refrigerated it overnight. 
Speaking of ganache, let’s make some now.  For ganache I’ll be using on a cake, I prefer to use milk chocolate, but you can use whichever variety you like.  Since Hubby had to stop at the store, I had him go to Trader Joe’s and get me one of their awesome pound plus chocolate bars, but you can definitely use chocolate chips for this if you want.  You’ll need about 3 cups, or just over a pound of finely chopped chocolate or chocolate chips in a glass bowl with plenty of extra room. 

Heat 1 pint of heavy cream over medium heat until it just barely reaches a simmer.  You’ll see little bubbles forming around the edges.

Pour the hot cream over the chocolate, and leave it for 2 minutes. 

After two minutes, grab a whisk and slowly start stirring.  At first it’ll just look like a mess. 

But it will eventually come together and become perfectly smooth and creamy.  It might seem a bit thin while it’s hot, but it’ll firm up as it cools. 

Pull your cold cake out of the fridge and peel the parchment off the bottom. 

What did bakers ever do before parchment?  Place your cake on a flat surface that’s elevated.  I just flipped the cake pan over.   Using a large knife, cut your cake in half.  I know it’s easier said than done, but just try to keep your knife as level as you can and keep turning the cake.  If you cut it a bit higher than I did, it’ll look more uniform when it’s finished. 

When your ganache is fudgy, but still spreadable, plop about a third of it onto the bottom half of your cake.  Spread it around, leaving about a half inch border.  It’ll spread a bit more when you put the top on, and whatever space is left, will be filled when you cover the sides. 

Place the top layer on the ganache and press it down slightly. 

Glop the rest of your ganache in a pile on top.

Spread it around until it starts to hang over the sides. 

Then just start to work that around the sides.  An offset spatula makes this job a lot easier.  I’m no cake decorator, so I basically just keep spreading the ganache around until everything is covered fairly evenly.  You might have noticed that I placed my cake on strips of parchment… this is why.

You can pull them out, leaving a clean surface around the base of your cake.  Ganache tends to stick to the parchment a bit, so just sort of poke your spatula along the edge to help loosen it from the parchment, then pull the strip out slowly.  Personally, I’m of the opinion that chocolate cake should have as few adornments as possible.  I opted for just sprinkling the edge with a little shaved chocolate, which I made by just running a vegetable peeler over a bar of chocolate.  Never will you see me use sprinkles.  They are evil, wretched, horrible things that taste much more like plastic than food.  But do as you like.    

Really you don’t need more than just a plate and a fork, but I added a dollop of fresh whipped cream to my plate.  You can’t really go wrong with whipped cream, can you? 
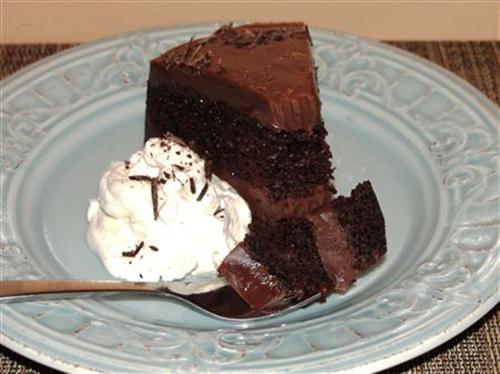
This cake is extremely rich.  You’ll probably want to cut smaller slices than I did.  I ran out of steam before I could finish it. 

What’s your favorite chocolate indulgence? 


Sunday
Jan082012

so, I still have a blog?

Welsh Cakes to make amends for my lengthy absence.

Yes, I know, I've been gone for a while. And yes, Taneasha is actually totally fucking awesome. Not only did she cover me with her lovely nuts, she also put together an epic year end clip blog of all the weird crap and awesome shit we did all year. Me, I was getting fucked. Proper fucked. And making all kinds of tasty foods. Everything from fancy Mexican late night dinners to desserts that make the kitchen look like a scene out of Dexter to elusive Italian cookies that you pay for then they somehow don't make it home in your grocery bag.

And I introduced Recipe Guy and his family to one of my family traditions. Well, family recipe. The tradition kinda changed with the generations.

My grandmother was Welsh and made these amazing tasty little treats to have with tea. Welsh Cakes. But when she made them, they were tiny, sugar coated, and you were damn lucky if you got 2 out of her. She was not the sort of plump cuddly grandma who stuffs you full of cookies and love that people like to imagine. She had a switchblade cane (okay, really, it was a little ice grip on the bottom, but we wouldn't put it past her at all to use it on one of us if we pissed her off).

When my dad started making them things changed. No longer were single batches made. Not even double. Not triple. We used the large punch bowl to make quintuple batches. We didn't roll and cut them nicely, we formed great hulking patties with our hands. And we didn't begrudgingly hand them out as if they were made of solid gold. Oh no, we each got a large paper grocery bag with our name on it, and the Welsh cakes were evenly distributed among the bags for us to then hoard and eat at our leisure.

They became fully negotiable currency.

What my littlest brother wouldn't do for a welsh cake.

And it seems it's not just Cymry that love these scone-like cookies (really, I think they're only called cake based on the archaic method of describing the shape of them), oh no, Southern Momma took a right shine to them.

I'll bet you two that you do too.


Welsh Cakes

(we made a double batch, this is the recipe for a single)

What you need:

  • 2 c flour
  • 1/2 c sugar
  • 2 1/4 tsp baking powder
  • 1/4 tsp salt
  • 1/2 tsp nutmeg
  • 1/2 c butter
  • 2/3 c currants
  • 1 egg
  • 2-3 tbsp milk

A couple notes on ingredients:

1) Yes that is all the liquid in it, and yes you will panic your ass off as you mix, but yes, it will work. You'll see.

2) Currants. Currants are not raisins, contrary to what the morons and bastards at SunRype would have you think.

Despite what it says on the package, these are not currants. They are just small raisins marketed as currants. The US doesn't seem to have proper currants. Dried fruit and candied citrus peel are typical, but I really don't think raisins work in these. Even tiny ones claiming to be currants. So we opted for dried blueberries and a bit of lemon zest.

What you gotta do:

In a large bowl combine the flour, baking powder, salt, zest (we used about a tbsp), and nutmeg.

Now, you're going to have to "cut" in the butter like you would if you were making a pastry or a scone. You start with smallish chunks of cold butter just dropped into the bowl.

Taneasha tried this with two knives, and really the woman needs a pastry cutter. If you don't have one, you can try the knife thing, or just use your hands, like she did. I would also suggest a food processor for the cutting of butter into flour, but only once you have an idea of what it's supposed to look like so you don't over mix it.

The first few times you use a pastry cutter you're going to think it's totally fucking useless because this happens.

But then you realize that you just have to use a knife to scrape the chunks off and keep going until you get something that looks more like fine bread crumbs.

And when you squeeze a handful

it should do this, and hold its shape

but it should easily disintegrate when you poke it. 

Whisk in the blueberries. Or currants. Or candied orange and lemon peel. Or any combination thereof that you think would be tasty with a nice cuppa tea. I still don't recommend raisins.

In a small bowl, beat the egg and milk together. Yup, that's all the liquid you need. I really recommend starting with only 2 tbsp and adding the third a few drops at a time if you really feel like you need it.

Make a well in the dry stuff and pour in the egg.

In not too long your wooden spoon will be caked and need to be scraped with that knife you still have handy.

And then eventually you're just going to dig in with your hands.

This dough can tolerate a bit more handling than a real pastry, but still, best to get it out on the counter as soon as possible and just press it together.

I forgot to take a pic of the dry, crumbly looking mound of dough, but I think you'll get and idea of what it looked like before I started rolling when you see this:

Yup, cracked and floury, and you are totally sure it's completely bitched. But, you keep rolling anyway. And ... wtf, you have to actually add flour to stop it sticking to the rolling pin? I know right. Totally bizarre seeming.

But for some reason, the more you roll it

the more it starts looking like a cookie dough.

This is one of the strangest recipes and Recipe Guy was well past skeptical.

You can break off little chunks and roll them then flatten them in your palms, or you can just cut a grid with that knife and make square ones, or you can use a wine glass to cut rounds and make "cakes" of dough.

No, I did not forget to preheat the oven.

These are cooked on the stove top. A good cast iron pan, a wide flat nonstick, or an electric frying pan (does anyone even have those anymore??) will work just fine.

Medium low was all we needed to get them nicely browned.

And you can just leave the dough on the counter and it won't dry out. And you can just press the scraps together and roll them, and you'll probably even need a bit more flour to prevent the rolling pin from sticking.

Dude, I'm not making this shit up. It's a weird old-school, old-world recipe that defies modern, North American conventions and beliefs.

They puff up significantly when they're in the pan. That's one way to tell they're ready to be flipped. The other is that the edges will start to look white.

They only take a few minutes on each side to get nicely golden. You don't want the heat too low, or they'll dry out in the pan before they get brown enough, so you'll probably end up sacrificing the first couple to get the right temperature.

Really, the dark ones are good, but they don't make for the nicest presentation, so you may as well just eat them yourself.

And you don't want them too pale. They seem to look nicer when they're more brown than golden.

If you don't have people hovering around you waiting for them to be fresh and hot right off the pan, pile them onto a plate. 

This will likely be the one and only time you get to present them like this. Next time, they'll be waiting.

What kind of cookies did your grandmother make for you?