Search
Categories
Have a request?
  • Don't be shy!

    Is there something you'd like to see more of or a specific recipe you'd like us to make? Or do you have a question related to food or cooking? Even if you just want to say hello and introduce yourself, feel free to use the form below!
  • Your Name *
  • Your Email *
  • Subject *
  • Message *


Entries in snack (80)

Tuesday
Dec132011

liquid lunch

It's exam time. Finals. Two down and two to go. Really not looking forward to three hours of calculus on Saturday night.

I need energy here. Lots of it, in a fast, easy to make, and quick to consume form.

And for that, we break out the blender.

No, it's not margarita time yet. Though, wow, I could totally do with a tall frosty glass of slushy booze.

Gah! Exams! Must. Study. Must. Eat.

Berry Berry Smoothie

What you need:

  • 1/4 cantaloupe
  • 1 mango
  • 1 c frozen blueberries
  • 1 1/2 c frozen raspberries
  • 1 c vanilla yogurt
  • 1/2 c pear juice

What you gotta do:

If you've got one of those little single serving blenders, I totally suggest it. You won't have to wash an extra cup.

My berries were picked over the summer by a coworker and frozen on a cookie sheet before bagging. I really think frozen fruit is the way to go with smoothies. It removes all temptation to use ice cubes in them. The smoothie will be perfectly chilled, and not watered down at all. It also won't separate if it sits for a few minutes.

Chopping a mango is something most people need to learn how to do. It's not an intuitive process, and it does take a bit of practice to maximize the mango recovery, but it's fairly simple once you know what to do. 

The pit is wide and flat and runs lengthwise down the middle of the fruit. Stand the mango up and align it so that it's long side is pointing away from you.

Don't slice down the middle of a mango. Ever. Offset the knife by about 3/4 of an inch.

Slice straight down. Do the same to the other side.

You can trim the last little bits off the middle, but what you have here is the bulk of the flesh.

Score it just to the skin, lengthwise and then crosswise.

Then, with your thumbs on the edges and your fingers on the bottom, flip it inside out.

Perfect bite-sized chunks just waiting to be bitten.

Or sliced off and put in a smoothie.

You can do something similar with the canteloupe. My dad always did this when I was a kid; they're called canteloupe caterpillars.

Both the mangos and the canteloupe go into the blender on top of the berries.

You can use any flavour of yogurt that you want in your smoothie, but I had a good quality, high fat (8.5%, which is insanely high for yogurt, but really not bad compared to most dairy products) vanilla. 

Pour in your pear juice. Again, the kind of juice is flexible. More what you need here is some lubricant to keep the mixture moving in the blender. Yes, vodka would work just fine.

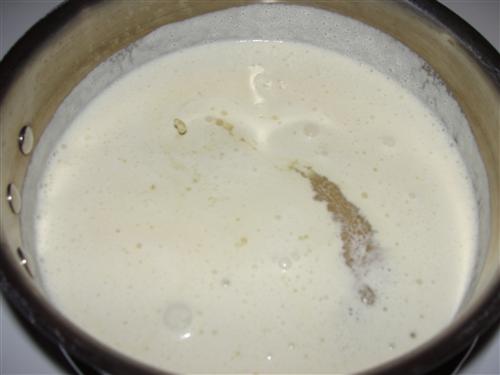
This starts looking smooth so fast I barely had time for a picture. I did have to poke at it once to get everyone moving around (I'm not going to warn you to turn the blender off before you stick a spoon in it. If you can't figure out not to stick metal objects into fast moving and sharp blades, I expect to see you on the Darwin Awards).

It will look totally done after only a few seconds on high, but this is deceiving. There are still chunks.

Once you've got it whizzing around on high speed, give the smoothie a full minute in there. You'll need it, but you'll still likely end up with the odd blueberry that manages to escape unscathed.

Pour your delicious dinner into a tall glass and add a bendy straw!

That's your average 10-12 ounce glass. I was able to fill it up twice. 

And while I was slurping down the first one, the stuff in the blender didn't separate at all.

Smoothies store in the fridge just fine for a couple days and are totally portable. They make great grab-and-go breakfasts if you make them the night before and keep them in the fridge, or awesome afternoon snacks if you need a boost at work.

And if you get yourself some bags of prechopped frozen fruit, they take less than 3 minutes to make.

What's your favourite blender drink?


Friday
Oct212011

With Caramel, Even Failure is Delicious

Caramel apples are a very traditional treat around Halloween.  In my house, as I’m sure it was in most of yours, dipping apples involved unwrapping a whole bunch of premade caramels.  Well, the truth is, premade caramel doesn’t hold a candle to homemade.  After my first attempt at making my own, though, I understand why our parents always defaulted to the caramel cubes.  It’s easy, and more importantly, it’s foolproof.  I had two caramel apple making sessions.  The first was simply a lesson in all the things not to do when making caramel apples.  I’ll let you learn from my mistakes, so you can make beautiful caramel apples on your first try. 

Here’s what you’ll need:

1 cup sugar
½ cup brown rice syrup
½ cup milk
½ cup cream
(or 1 cup half & half)
¼ teaspoon salt
1 teaspoon vanilla
Whatever toppings you want to use

Lesson one:
When I lived in Utah, most grocery stores would have a whole caramel apple setup around the apples this time of year.  This always included popsicle sticks.  Well, here in Mass., that is not the case.  The two grocery stores I went to did have caramels by the apples, as well as those caramel wraps and caramel dip.  They didn’t, however, have sticks… anywhere in the store.  After much creative thinking, I finally decided that plastic knives would work just as well. 

They don’t.  They bend, and if you’re not careful, they even break.  If your grocery store doesn’t have sticks, wait until you can go to a craft store and get some.  For round two, I bought little wooden dowels which worked perfectly.  So that’s step one in the process.  Wash and dry your apples thoroughly, then insert your sticks about halfway into the apples.

Lesson two:
Even buttered parchment can stick, and if it does, it tears easily.  Instead, line a sheet pan with buttered foil.  Heavy duty foil if you’ve got it. 

Now it’s time to start on the caramel.  This recipe makes enough caramel for about 4 medium sized apples.  Feel free to double the recipe if you need more, but make sure your pan is big enough.  The caramel expands while it’s cooking so you need plenty of room.  Poor in the sugar, brown rice syrup, milk, cream, and salt. 

Stir the mixture over low heat until the sugar dissolves, then raise the heat to medium.  Stir constantly until the mixture comes to a boil. 

Once it boils, stop stirring.  At this point, you can either place the lid on the pan for a minute or two or you can wash the sides of the pan with a pastry brush and water.  Either will work to get rid of any errant sugar crystals.  It’s important to do this because one seed crystal can turn this whole pot into a grainy mess.  (If that happens to you, by the way, you can add a bit of water and start the whole cooking process over.)  So, I don’t believe in candy thermometers.  I think they’re a pain, and rarely reliable.  I use the drop a bit of candy into ice water method.  Perhaps that's where I went wrong. 

Just drop a bit of the candy mixture into ice water and feel it between your finger and thumb. 

Lesson three:
The caramel needs to change color a bit more and hold its shape a little better than that.  When it comes out of the ice water, it should have just about the consistency you want it to have on the apples.  It’s called the firm ball stage. 

When you reach that stage, turn off the heat and add the vanilla.  It’ll hiss and sputter, so be careful and stir quickly.  Once it’s incorporated, pour the caramel into a clean pyrex or metal bowl. 

If, like me, you have a little puddle of caramel where you’ve been setting your spoon, don’t waste it.  That’s liquid gold… and not of the Velveeta variety. 

While the caramel cools slightly, prepare your toppings.  My favorite was the coconut, but some other things you can use are mini chocolate chips, toffee pieces, pumpkin seeds, chopped nuts, and although I don't usually use things that are artificially colored, I thought Reeses Pieces were a cute option for Halloween.  I used a paper plate for round one, but found that a shallow bowl actually works better, in round two. 

Yes, that was my attempt at a jack-o-lantern.  I’m no better at making the real thing.  Fortunately for me, dogs don't have any interest in carving pumpkins.  But, onto dipping.  Place the apple sideways in the caramel and roll it to coat all the way around. 

Allow the excess to drip off. 

Turn it upside down and move it around to even out the caramel and allow it to cool.  When it is mostly set, roll the bottom half of the apple in you topping. 

On some of them, I also sprinkled a bit of sea salt on the top half. 

So, what happens if you don’t cook your caramel long enough? 

Most of it runs off and pools around the apples.  I wasn’t about to just waste all that caramelly goodness, though, so I scraped it off and had caramel candy piles, which I refrigerated and then cut into bite size pieces. 

Fortunately, round two was much more successful. 

If you’ve cooked your caramel just right, you’ll end up with just a small ‘foot’ at the base of the apple. 

Personally, I like to cut mine into more manageable pieces to eat them. 

Feel free to just bite into it, if that’s more your style.  Either way, you’ll be glad you went to all that effort instead of using the premade stuff… even if you have to do it twice. 

Do you have any candy failure experiences?