Well, I'm sorry to say that Seeley lost her battle with math this week. She hasn't had time to eat, let alone cook and blog about it. Not to worry, though. As long as she survives her exams, she'll be back next week. In the meantime, I bring you Holiday Candy Making: Mint Creams Edition.
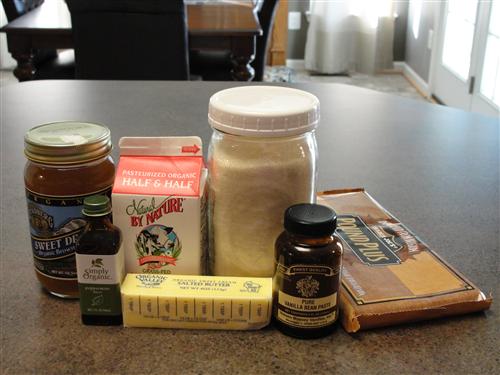
Here's what you'll need:
- 2 ½ cups sugar
- ½ cup half & half
- ½ cup water
- 3 Tablespoons butter
- 2 Tablespoons brown rice syrup
- 1 teaspoon vanilla
- 2 teaspoons peppermint
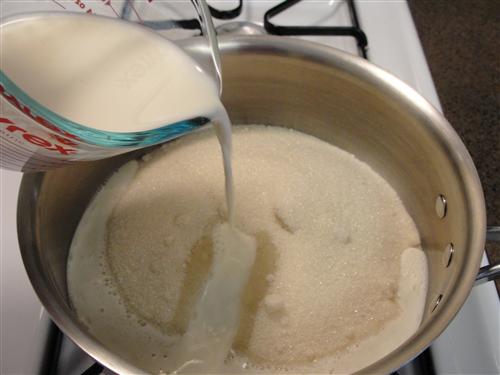
In a saucepan (2.5 quarts or larger) put your sugar, and pour over the half & half and water.
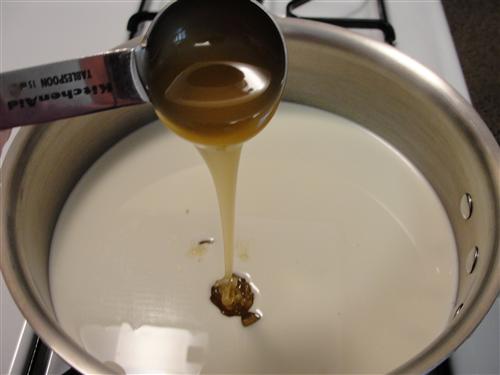
Add the syrup. Now, I understand that not everyone keeps brown rice syrup on hand, so if you only have corn syrup go ahead and use it instead.
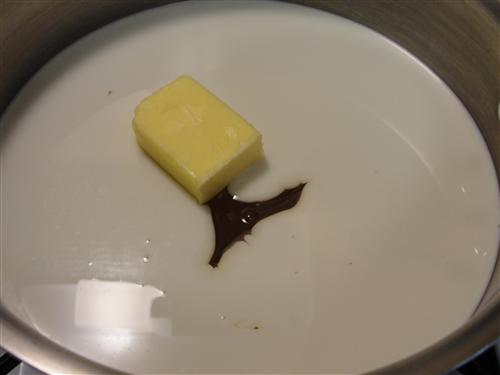
And last into the pan, the butter.
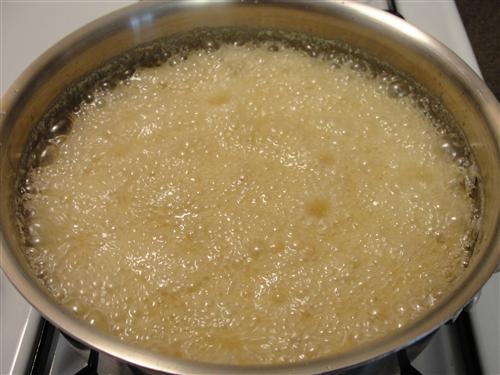
Turn the heat to medium and stir everything together. Continue to stir until the mixture comes to a full boil.
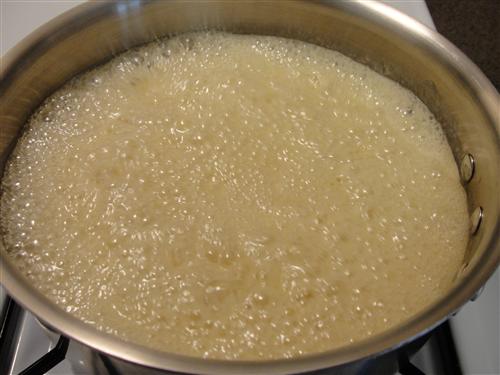
Pop on a lid and leave it for 2 minutes. See all that condensation? That’s what washes all the sugar crystals off the sides of the pan, which is very important because one rogue crystal and can turn the whole batch into a grainy mess.

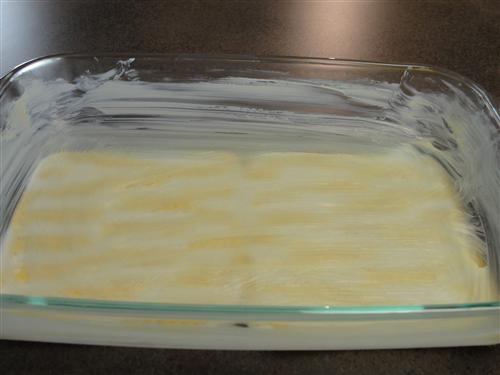
While the lid is on, wash the spoon or get a clean one out. Also, get a small dish of ice cold water, and if you haven’t yet done so, butter a glass pan and set it atop hot pads or a folded towel. I doubt you can do all that in 2 minutes, so you probably ought to butter the pan before you start.
Go ahead and remove the lid. When you begin to see larger bubbles forming, it’s time to start testing.
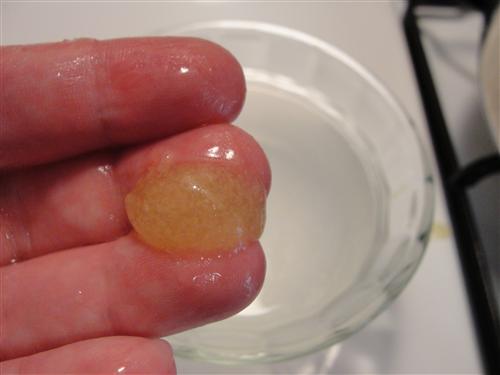
Get a little of the mixture on a spoon and drop it into the cold water.

You should be able to just scrape it together into a blob and pick it up.
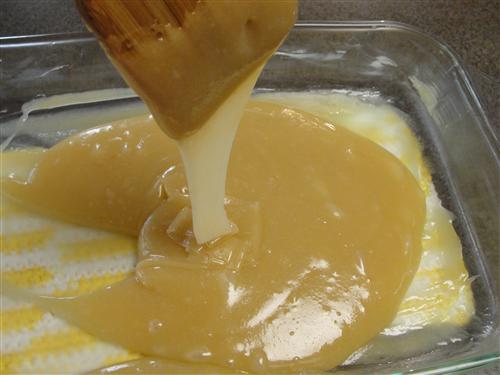
Once you’ve reached that stage, go ahead and pour it into your prepared pan. Be very careful because this is extremely hot! (hence the hot pads under the pan)
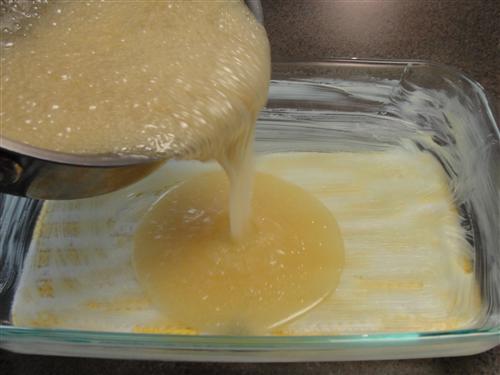
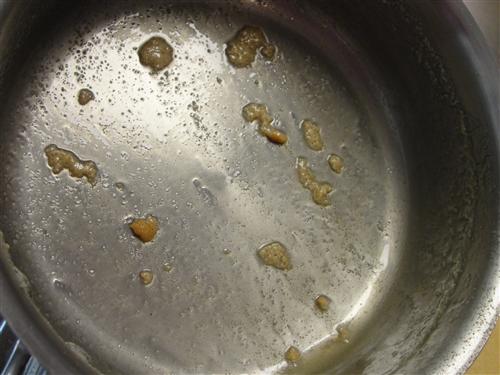
You’ll have little bits stuck to the bottom of the pan, but don’t scrape them out. Candy can be a bit temperamental, so just trust me.
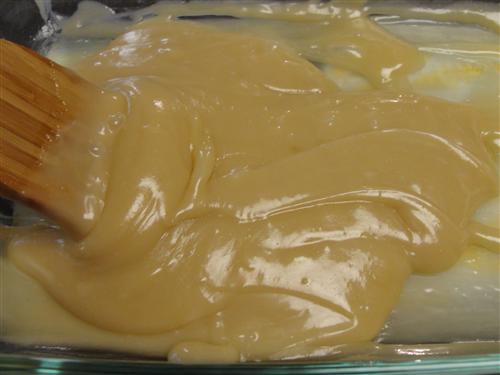
Now allow the candy mixture to cool for a bit. You want to be able to hold your hand on the bottom of the pan. It’ll be warm, but not uncomfortably so. That should take 20 – 30 minutes. While you’re waiting, go ahead and line an 8x8 pan with parchment. When the candy has cooled enough, go ahead and add the flavorings over the top.
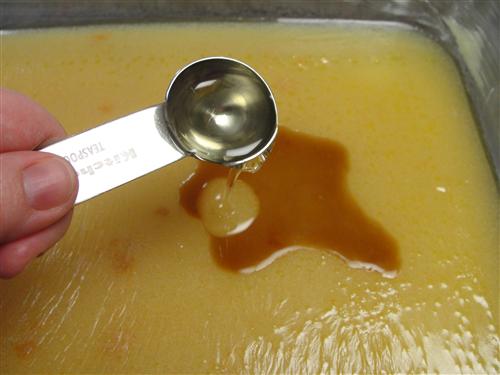
I should probably mention that if you’re using a different brand of peppermint flavoring, or if you’re using peppermint oil or extract, you might need to adjust the amount. And now, the fun begins. Using some sort of sturdy utensil, (I like a wooden spatula) start stirring.
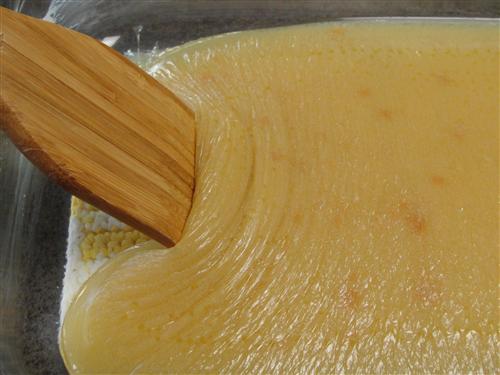
Ok, stirring might not be the right word. It’s more just scraping and folding. Basically just keep it moving. At first it will be like a thick, syrupy, gooey mess.
But don’t worry. Just keep stirring. There’s magic happening in there. You’ll know it’s working as the mixture gradually becomes opaque.
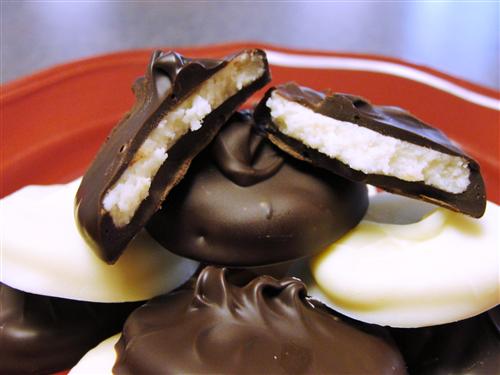
And eventually, this happens! Goodbye sticky, gooey mess. Hello peppermint cream! Although peppermint fudge might be a better description, since that’s basically what you have at this point.
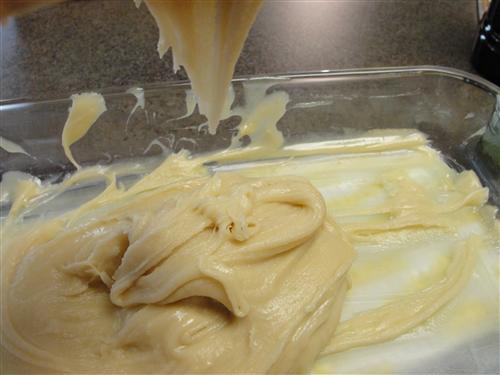
Press it into your prepared pan, scraping every last morsel out of the stirring pan. Get it even-ish across the top, but don’t worry about it being perfect or pretty.
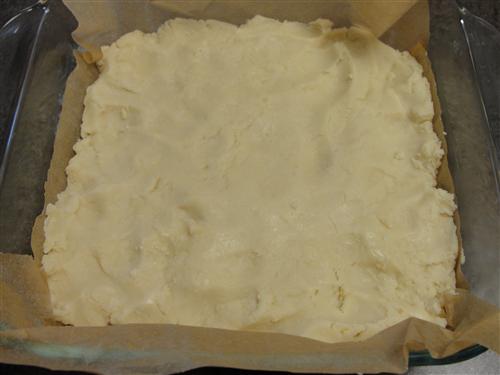
Now, cover it and hide it because it smells fabulous, but it needs to sit overnight. The fudgifying reaction takes time to finish its… reactioning. What? I’m not a physicist (or is this in the chemist’s realm? Those two things definitely overlap). I just know there’s special sugar crystal stuff going on in there and it’s much happier to be worked with after being left to its own devices for several hours. You can even see the difference in this picture. The texture is much creamier.

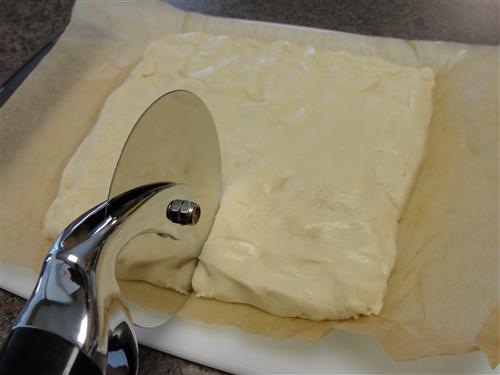
Using a pizza wheel, cut the block into 64 squares. (Cut the square in half, the halves into quarters, the quarters into eighths, and repeat in the other direction.)
I’ll tell you now, it’s going to be a mess. They’ll all be stuck together and different sizes, but don’t worry about it.
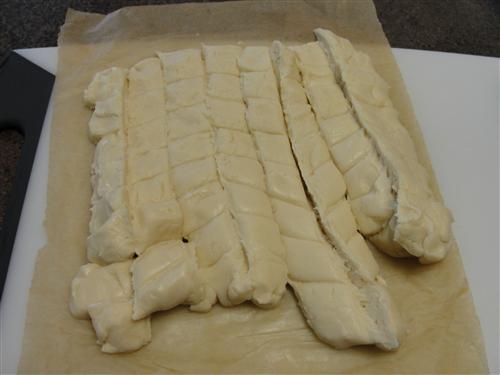
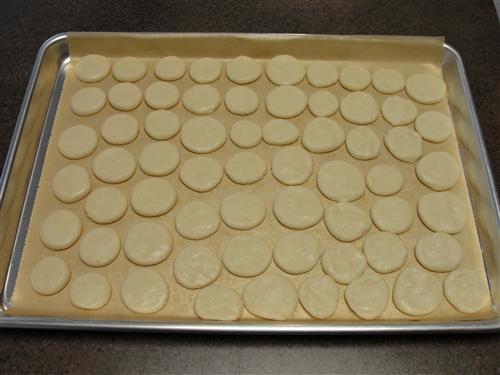
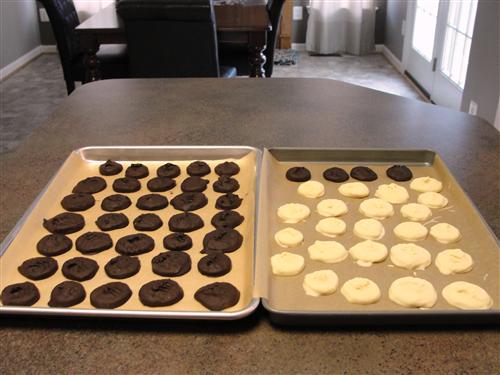
Just pull them apart and place them onto a parchment lined sheet pan. It’s best to flip them over as you do this and put the sticky side (what was the bottom) facing up. Then pop them into the fridge for an hour.

When they’re nice and cold, place each square into the palm of your hand.
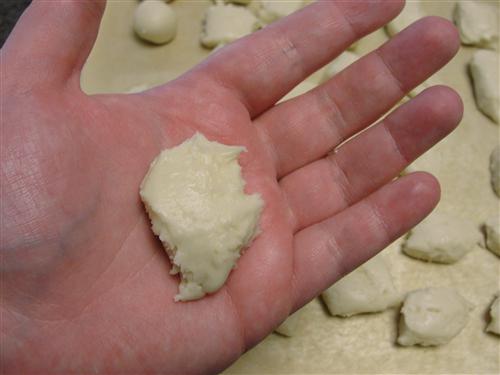
Squish in any corners or pokey bits, and roll it into a ball.
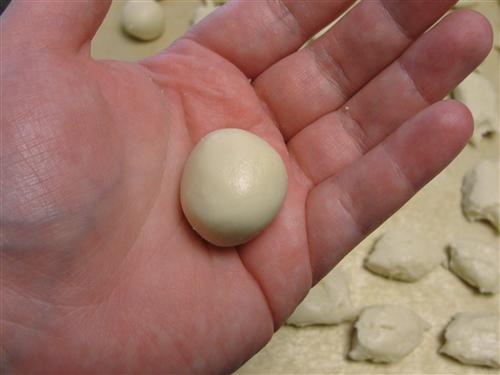
You’re going to be rolling balls in your hands for awhile, so you might as well sit down while you’re doing it.

After ball rolling, comes ball smashing. I found it easiest to just use my thumb by pressing it into the middle, and then sort of tapping it around the edges.
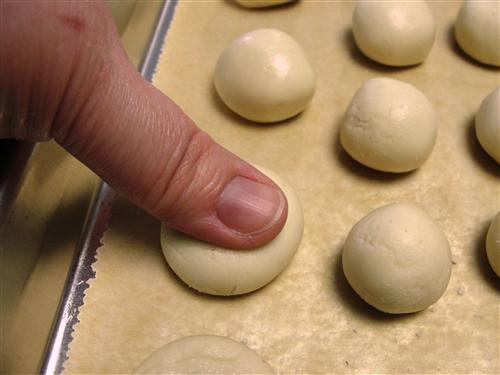
You want them to be about ¼ inch thick. When they’re all flattened, place them back into the fridge for a bit because your hands will have warmed them up.
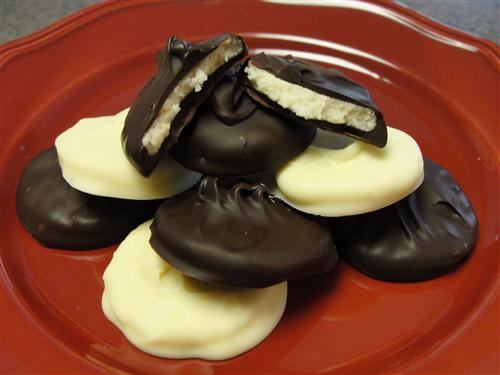
When your patties are cold, they’re ready for dipping. Place whatever kind of chocolate you like into a bowl. I actually did 2 separate bowls, one for dark chocolate and one for white chocolate. I love white chocolate and mint together.
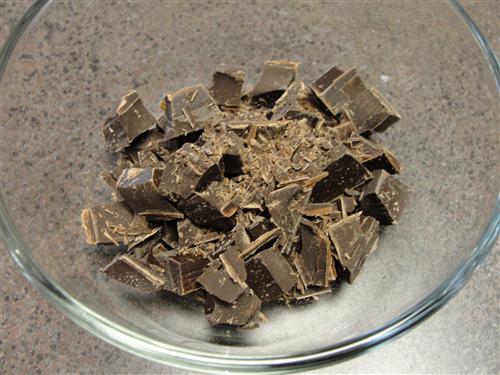
Whatever you’re using, melt it. If you’re using the microwave, do it in 30 second intervals, stirring between each one.
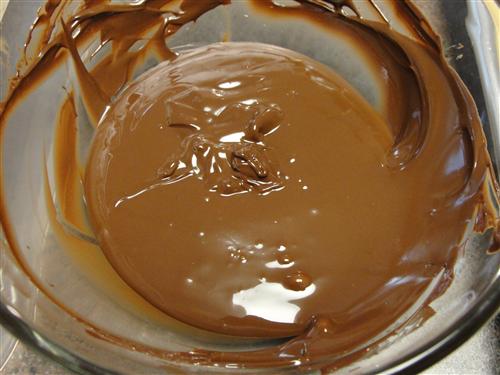
When it’s ready, go ahead and drop in a patty.
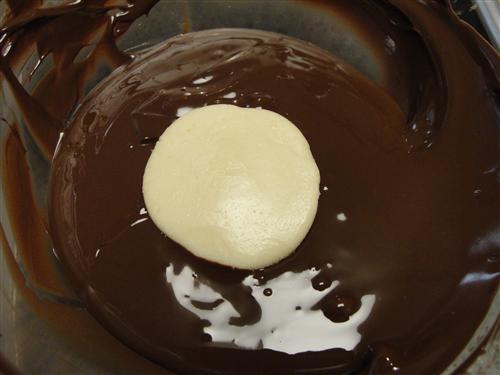
Using a fork, flip it over, allow the excess chocolate to run off, and place it onto another parchment lined sheet pan. Repeat 63 times, and voilá! Peppermint patties galore! I think mint chocolate stuff is always better cold, so once they’re set, just put them in an airtight container in the fridge.
These are perfect for gifts, to have out for people when they come for a visit, or you can just eat them. Hubby says they are the best mint creams he’s ever tasted. Me being a bit of a chocoholic, we’ve been to lots of high end chocolate shops, so that’s quite a compliment. Without patting myself on the back too much, I have to admit he’s right. Not only are homemade chocolates better than what you can buy in any store, but as an added bonus, they’re also way cheaper. I used organic, high quality ingredients, and two huge pans of chocolates cost me less than $10.
What’s your favorite flavor of chocolate creams?
 Seeley deBorn