Search
Categories
Have a request?
  • Don't be shy!

    Is there something you'd like to see more of or a specific recipe you'd like us to make? Or do you have a question related to food or cooking? Even if you just want to say hello and introduce yourself, feel free to use the form below!
  • Your Name *
  • Your Email *
  • Subject *
  • Message *


Entries in brunch (39)

Friday
Jan202012

Pudding Made From Chinese Leftovers?

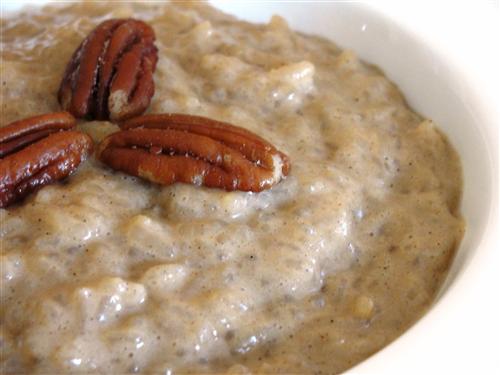
Ever wonder what to do with that extra carton of rice you always get from the Chinese takeout place?  You hate just throwing in the trash, so you decide you’ll use it for dinner sometime this week.  Ten days later you realize it’s still in the fridge and end up throwing it in the garbage anyway.  Well, no more.  This rice pudding is so easy and so delicious, you’ll be thrilled to have leftover rice anytime. 

Here’s what you’ll need:

2 cups cooked rice
2 ½ cups vanilla coconut milk
¼ cup sugar
½ teaspoon cinnamon
Pinch of nutmeg
2 teaspoons vanilla
1 Tablespoon cornstarch
1 egg
2 Tablespoons butter

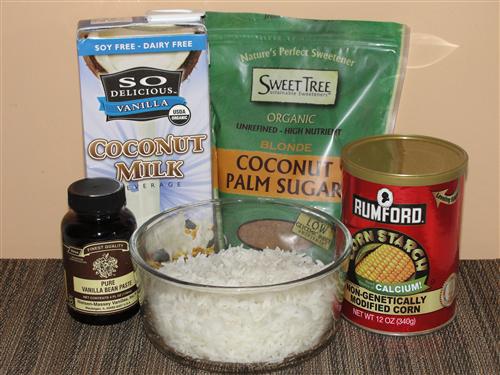
Ok, so mostly just ignore my ingredients picture.  I missed a few things… egg, cinnamon, etc.  I’m sure you know what those look like, though.  Recently, I discovered So Delicious coconut milk.  Well, coconut milk beverage it says on the carton.  I don’t know what the difference is from the stuff in the can, exactly, but I like the So Delicious vanilla flavor to put on my oatmeal in the mornings.  It’s seriously yum, so I thought, why not use it for my pudding.  Now, if you don’t want to go out and buy some, go ahead and substitute regular milk and add an extra 2 Tablespoons of sugar.  And speaking of sugar… you can see that I am also using coconut palm sugar.  Don’t worry about that.  I just bought it recently and wanted to try it out, regular granulated sugar or even brown sugar will be totally fine. 

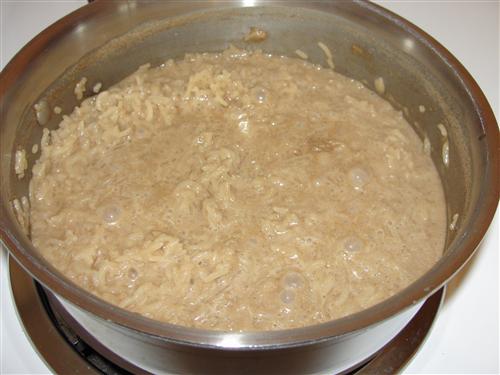
So now that that’s out of the way, let’s get started.  In a medium saucepan, pour 2 cups of the milk and stir in the cooked rice, sugar, cinnamon, and nutmeg. 

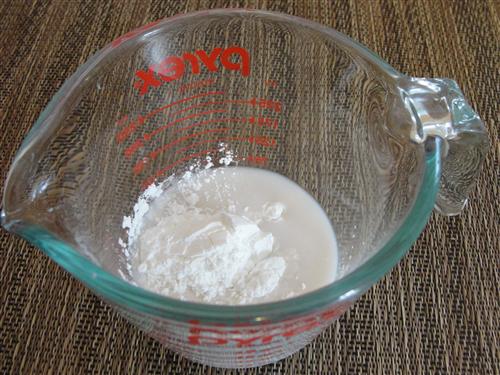
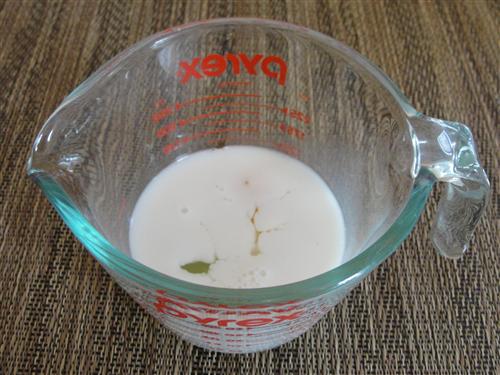
In a separate dish, whisk together 1 Tablespoon of cornstarch and ¼ cup of the remaining cold milk. 

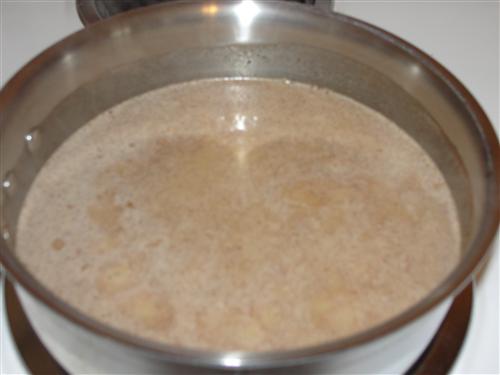
Bring the rice mixture to a low boil and cook, stirring constantly for 5 – 7 minutes.  Much of the liquid will have cooked off and the mixture will look something like this.


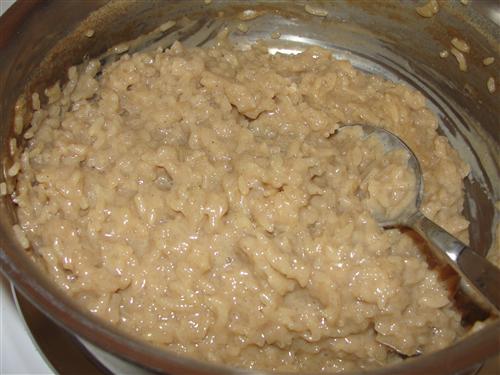
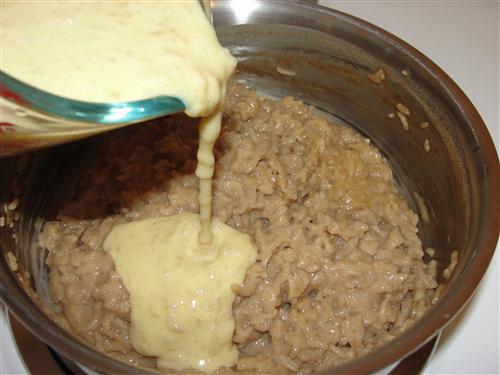
Stir in the cornstarch slurry. 

Once the pudding reaches a boil again, it will be nice and thick and creamy. 

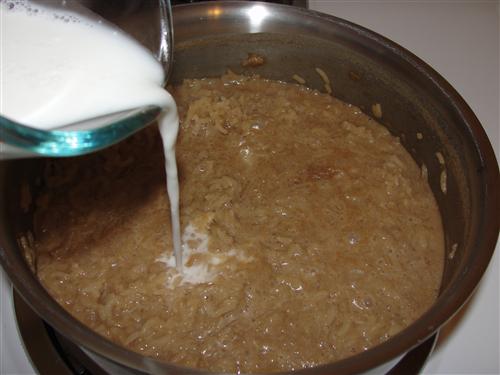
Go ahead and turn the heat to low.  In another dish whisk together 1 egg, the remaining ¼ cup milk, and 2 teaspoons vanilla. 

When adding eggs to something hot, you need to bring them up to temperature slowly.  This process is called tempering.  To do that, simply add a bit of the hot pudding to the egg mixture and whisk it in.  I added a total of about a cup of the pudding, in three additions. 

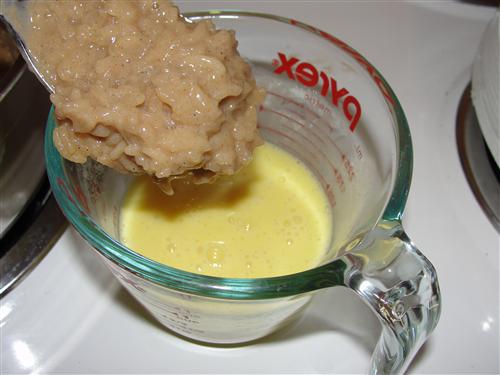
Pour the now hot egg mixture into the pudding and stir everything together.  The residual heat from your pudding will cook the egg, so go ahead and turn off the heat. 

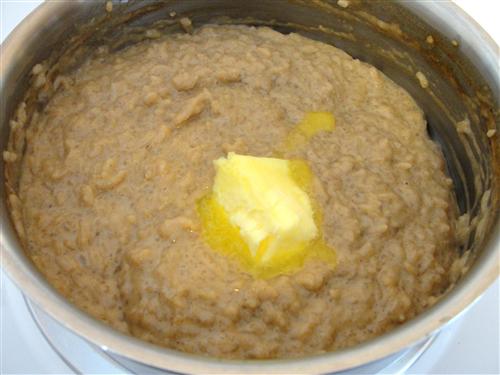
Now for the final touch.  Stir in 2 Tablespoons of butter. 

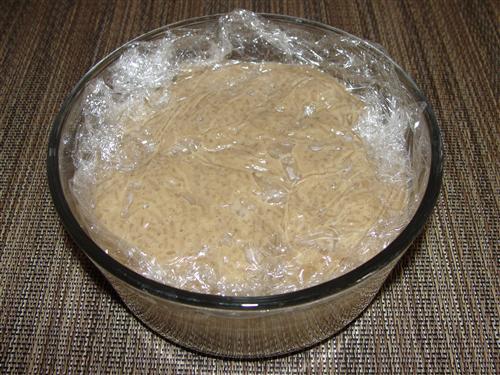
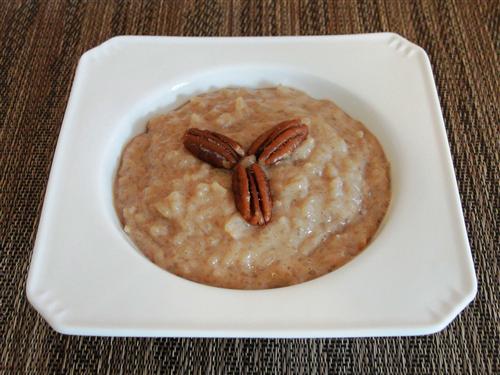
You have just reached rice pudding heaven.  If you like your rice pudding cold, like I do, make sure you press a piece of plastic wrap directly on top of it so that it doesn’t form a skin, and then go ahead and refrigerate it. 

I think most people tend to like rice pudding warm, though, so just garnish it with a few nuts and/or raisins.  Personally I think raisins are the devil.

What’s your favorite kind of pudding? 


Tuesday
Dec132011

liquid lunch

It's exam time. Finals. Two down and two to go. Really not looking forward to three hours of calculus on Saturday night.

I need energy here. Lots of it, in a fast, easy to make, and quick to consume form.

And for that, we break out the blender.

No, it's not margarita time yet. Though, wow, I could totally do with a tall frosty glass of slushy booze.

Gah! Exams! Must. Study. Must. Eat.

Berry Berry Smoothie

What you need:

  • 1/4 cantaloupe
  • 1 mango
  • 1 c frozen blueberries
  • 1 1/2 c frozen raspberries
  • 1 c vanilla yogurt
  • 1/2 c pear juice

What you gotta do:

If you've got one of those little single serving blenders, I totally suggest it. You won't have to wash an extra cup.

My berries were picked over the summer by a coworker and frozen on a cookie sheet before bagging. I really think frozen fruit is the way to go with smoothies. It removes all temptation to use ice cubes in them. The smoothie will be perfectly chilled, and not watered down at all. It also won't separate if it sits for a few minutes.

Chopping a mango is something most people need to learn how to do. It's not an intuitive process, and it does take a bit of practice to maximize the mango recovery, but it's fairly simple once you know what to do. 

The pit is wide and flat and runs lengthwise down the middle of the fruit. Stand the mango up and align it so that it's long side is pointing away from you.

Don't slice down the middle of a mango. Ever. Offset the knife by about 3/4 of an inch.

Slice straight down. Do the same to the other side.

You can trim the last little bits off the middle, but what you have here is the bulk of the flesh.

Score it just to the skin, lengthwise and then crosswise.

Then, with your thumbs on the edges and your fingers on the bottom, flip it inside out.

Perfect bite-sized chunks just waiting to be bitten.

Or sliced off and put in a smoothie.

You can do something similar with the canteloupe. My dad always did this when I was a kid; they're called canteloupe caterpillars.

Both the mangos and the canteloupe go into the blender on top of the berries.

You can use any flavour of yogurt that you want in your smoothie, but I had a good quality, high fat (8.5%, which is insanely high for yogurt, but really not bad compared to most dairy products) vanilla. 

Pour in your pear juice. Again, the kind of juice is flexible. More what you need here is some lubricant to keep the mixture moving in the blender. Yes, vodka would work just fine.

This starts looking smooth so fast I barely had time for a picture. I did have to poke at it once to get everyone moving around (I'm not going to warn you to turn the blender off before you stick a spoon in it. If you can't figure out not to stick metal objects into fast moving and sharp blades, I expect to see you on the Darwin Awards).

It will look totally done after only a few seconds on high, but this is deceiving. There are still chunks.

Once you've got it whizzing around on high speed, give the smoothie a full minute in there. You'll need it, but you'll still likely end up with the odd blueberry that manages to escape unscathed.

Pour your delicious dinner into a tall glass and add a bendy straw!

That's your average 10-12 ounce glass. I was able to fill it up twice. 

And while I was slurping down the first one, the stuff in the blender didn't separate at all.

Smoothies store in the fridge just fine for a couple days and are totally portable. They make great grab-and-go breakfasts if you make them the night before and keep them in the fridge, or awesome afternoon snacks if you need a boost at work.

And if you get yourself some bags of prechopped frozen fruit, they take less than 3 minutes to make.

What's your favourite blender drink?