We Have Company!
 Seeley deBorn
 Okay folks, we roped someone into cooking dinner for us. And boy do we ever need it. Taneasha is on day twenty something of eating road food, and I'm sure there's more to eat in my house than granola and yogurt, but damned if I can find it.
Thankfully we have the darling Gemma Halliday here to feed us!
Check it out!
...
Chicken Nacho Bake Experiment
First off, thanks so much to the lovely ladies here at Author’s Kitchen for hosting me today. I’ve been salivating over their recipes for weeks. The amount of cheese used on this blog makes my heart happy.

I’m nearing the end of my Hollywood Confessions Blog Tour, but please check out my website for the last tour stops, as I still have a few cool prizes to give away. (Including gift cards, free books, cameo appearances, and Hollywood Headlines collectibles!)
Now, for the cookin’. I have to admit, I’m not known as the world’s best cook. In fact, up until recently, I had been a vegetarian for the past twenty years. As you can imagine, when I finally switched to meat again, cooking it was way out of my comfort zone. I’m slowly learn how not to burn it (only five kitchen fires later), but as the title of this blog states, I’m still more in the experimenting phase than the expert phase of my cooking journey. So, here goes nothing…
Chicken Nacho Bake
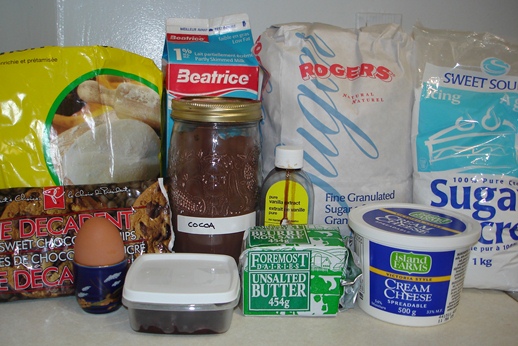
What you need:
- ½ lb chicken
- 2 cups pinto beans (cooked)
- 2 avocadoes
- 2 tomatoes
- small bunch green onions
- tortilla chips
- Cheddar Cheese
- spices (For mine, I used a good ¼ cup of mixed Mexican spices that I had on hand – chili powder, cumin, paprika, garlic powder, oregano, and onion flakes. But you can use whatever flavors feel south of the border to you or what you might have handy, adding more or less heat depending on what you like. I’ve even added cinnamon sometimes for an unexpected sweet note to tempt the kids.)

The first thing I did was put the chicken in a pan with just enough water to cover, and half the spices. I’m still a meat novice, so I prefer the milder white meat, but any cut of chicken that you like works. I popped this up on medium heat until the water started to boil, then let the chicken hang out there soaking up all the yummy spice juice.

While my chicken was enjoying its bubbly soak, I got the veggies ready. I grabbed a bowl and mashed the avocado…

Then chopped up my green onions…

Then diced the tomato.

(By the way – Seeley isn’t kidding when she says it’s hard to remember to take pictures of the food. Do you know how many tomatoes I chopped before I remembered to take a pic of one whole? We’ll be having tomato soup later this week for sure.)
By this time, my chicken was looking nice and cooked and losing its icky pink center.

So, out of the pan it came. I popped it up onto the cutting board, but left the pan on the stove with all the spice juices still bubbling.

Into the same pan I added my cooked pinto beans and the rest of the spice mixture, just to let the beans soak up a bit of the flavor before going in the oven.
(Oh, shoot! I forgot the oven. ‘K, go put it at 350. Perfect. Now back to the chicken…)
While the beans cooked, I grabbed a couple forks and started shredding the chicken. This was probably the most boring part of the whole process. I had no idea how long it takes to shred chicken. It’s kinda tedious, really, trying to get just the right bite-sized pieces. This is where I started staring off into space and daydreaming. On the upside, I got the first two chapters of my next book mentally plotted out. Bonus!

Okay, so now that the chicken is shredded, it’s time to start building our multilayer bake. I grabbed a baking dish and spread a single layer of tortilla chips along the bottom. If you’re really ambitious, you could make your own by frying fresh tortillas, but I am nowhere near that ambitious. So, I grabbed some of my boyfriend’s stash from the cupboard. (Anyone else think it’s slightly more than coincidental that he puts all the good chips, chocolate, and munchies on the highest shelf in the house? I had to grab a stepladder to break into it. Not cool, dude.)

Once the chips were down, the shredded chicken went on top of those…

And the beans came off the stove and went on top of that…
 And then another layer of chips went down on top of that. I added a couple slices of cheese on top, but only on one half of the bake, since my boyfriend doesn’t eat dairy. (He’s also gluten intolerant, which often adds another challenge to cooking. But, I am happy to say for anyone else who might have these kind of dietary issues, this recipe is entirely gluten free!)

Into the oven this went (which was more or less pre-heated at this point), for about 15 min, or until the cheese got all gooey and melty-licious.

Once it was warm and melty, I pulled that sucker out and add the veggies I prepared earlier in layers. First avocado, then tomatoes, and green onions.

And… ole! You’ve got a chicken nacho bake! You can garnish with a little lime wedge if you like, and the margarita is optional. (Though highly recommended!)

Huh. What do you know? No kitchen fire today. I must be getting better at this. ;)
Thanks again to Taneasha and Seeley for letting me come play in their kitchen! And to celebrate my actually edible experiment, (the boyfriend even had seconds! Muy bueno!) I’m giving away a Hollywood Confessions tile kitchen coaster!
 Just leave a comment below and you’ll be entered to win. I’ll have the munchie-hoarding boyfriend pick a poster at random tomorrow and announce the winner here.
Enjoy your fiesta!
~Gemma Halliday
HOLLYWOOD CONFESSIONS
is now available in: